Thing 4 – Notability

In my Honors Biology class the students are required to take their notes for my class twice. Once as a “messy” version that tey can doodle on and make mistakes on, and then another clean and well organized version. I don’t check this, rather, its on the “Honor” system… get it. But seriously though, I encourage our students to use notability one of the two times. Most choose to do it as the clean version because of the ability to highlight and color code their notes. On my end, I always provide a ‘pdf template’ for them to take their notes on. This usually means Cornell Notes (if you’re unfamiliar with Cornell notes, let me know and I’ll send you info, otherwise I’ll post on here about them soon)…

Cornell

Cornell notes organize the notes into “Key Ideas” and allow the notes to be the answer to the Key.

The advantage of using a ‘pdf template’ is that the students can easily download them directly to notability and write over the top.

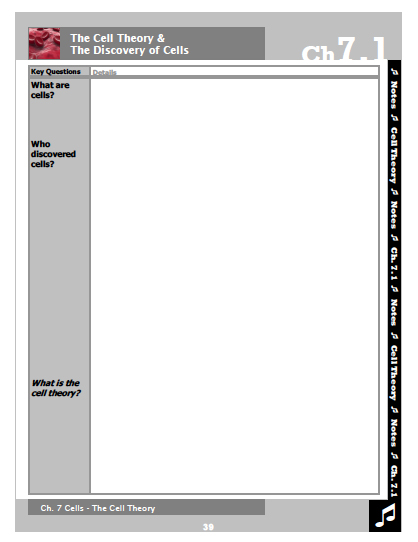
Notability may be great for notes… but it’s even better for graphic organizers. Using the iPad, notability, and a predetermined graphic organizer allows for an opportunity to collaborate with fellow students and share ideas causing the graphic organizer to grow (Talkboard is a great app for collaboration too!). The key is to start with a simple shape, and let the students decide what should go where. There is no right answer when it comes to graphic organizers because it is based on the way the individual student, or group of students, thinks.

Example of a simple graphic organizer from our cells unit

Example of a simple graphic organizer from our cells unit

So download that app and crack it open. If this post helped you, or if there are other ways I can be of assistance, please contact me and let me know.

Thing 3 – Social Media

If you look down the right side of this page you’ll see the live twitter feed for @CoachKubuske.
// This is my professional, and semi-personal, twitter feed that I use in my class. I have organized my other technology pieces (like wordpress and YouTube) to automatically update my Twitter with Tweets about new content added to this site. This is a chance to have technology do the work for you rather than you always feeling like this..

.

when it comes to new technology in the classroom.

The other advantage to your students having access to your twitter is that it:

  1. Gives them yet another avenue to contact you about class information (please remind your students about responsible use and the fact that it is inappropriate for them to ‘direct message’ you)
  2. Allows your students to ‘humanize’ you and see that you have hobbies and interests that they might have in common

Now, if you thought this information was helpful please let me know by tweeting at me
or by mentioning 13 for 13 in your own tweet! 
//

Thing 2 – Blogging

As a part of my class, I incorporate this blog using a site (and app) called wordpress. It’s a free service and gives me the freedom to create a “website”. WordPress allows users to customize their webpage, settings, themes, and other essential elements of web design. WordPress allows use to start at the novice level and still build a dynamic site. Blogging allows me to post daily content to a front page as well as “static” pages, or pages that don’t change on a daily basis. These are noted at the top in the tabs. This is where I post links to documents and answer keys.

FrontPage

The blog posts are the daily updates that read like articles on the front page. This would be information that is pertinent to that day and I would direct my students there at the beginning of a class. Its a great way to post information, task lists, and weblinks. Each post is tagged with a yellow marker showing the date, a title, and a category so I can keep organize posts for different classes on the same front page. When writing a blog post, it can be as simple as writing out a document…

Posting

I choose to use wordpress because it gives me the freedom to use ‘html’ code or as well giving me a lot of options to customize my page. The ‘dashboard’ is where I choose which options I want to change, use, or update…

DashboardYou can see on the left side some of the options. Posts and pages are for my information; Media is where I upload pictures or animations (you can also insert pictures from weblinks called “hotlinks”); Comments is where I can monitor student comments on my posts; Feedback are for polls; Appearance is where I customize the look.

I would strongly encourage other professional educators to start a blog of their own because of the flexibility it gives you to post daily information as well as static information.

Now, tell me what you think…